Even though it's a knitted scarf, you won't need any knitting needles, just your fingers. It's super easy. I completed the knitting in about an hour, while watching tv. Once I got into the groove of it, I didn't even need to look at my hands anymore.
What you need:
- one or two t-shirts
- scissors (alternately, you could use a rotary cutter, cutting mat and ruler)
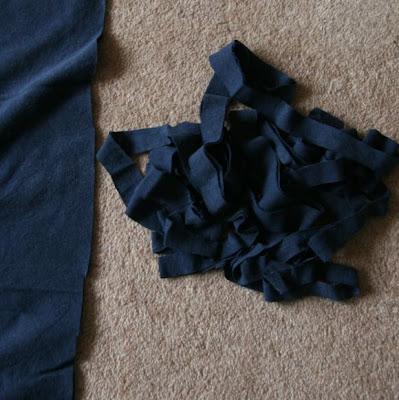
Start out with an old t-shirt or two, depending how long you want your scarf. I used two tops, and ended up with a scarf that, when laid around my neck, almost touched the floor. I had two maternity tops that had seen better days. I laid them out flat and just started to cut strips, discarding the hem.
I wasn't terribly careful about keeping the strips a consistent width, I figured it would add character to the scarf. If you wanted to have even, consistent strips, you could cut with a rotary cutter on a mat with a ruler.
When you've cut up both shirts, you're left with a bunch of looped strips. You'll need to cut one seam off each piece in order to get flat strips.
Now you'll need to piece them all together into one long piece of 'yarn'. I didn't document this part in photos, because there is a great tutorial here on how to do that. While you're there, check out her tutorial for knit bracelets, too clever! When I pieced my yarn, I alternated colors. I wish now I had been a little more random so my stripes were more uneven.
Once all your pieces are strung together, wind it all up into a ball to make it easier to work with. While you're winding the ball, tug on each section of fabric a little to make the fabric roll and stretch out a bit. This will allow for greater stitch definition.
When I started my scarf, I tried it on 4 fingers, but didn't like the way it was looking. It was a bit too thin for me, so I went to 6 fingers. Weave the yarn in and out of your fingers, starting at your left pointer finger. Once you get to your right-hand ring finger, come back the other way to get all your fingers covered. You'll end up with the yarn coming from the ball laying behind your left pointer.
To work your first row, bring that yarn to the front, around your left pointer and lay it across your fingers, above the cast-on row. Take each stitch from your cast-on row, and pull it up and over your finger, and over the yarn laying in front of your fingers, starting with your left pointer. Continue with each finger. Now bring the yarn back across your hand again, and work back the other way. Here's what the cast-on and first completed row looked like on 6 fingers (if this is unclear, please refer back to this bracelet tutorial):
Now, I could have just borrowed someone else's hands to make this a little easier on myself, but since I was the only one home when I wanted to work on it, I had to use my own. Photographing this by myself must have looked pretty funny. Luckily I have a remote on my camera to make it a bit easier. Here's how I did it with my own hands: I could still move my pointer and thumb, so I used those to work the stitches on the opposite hand.
Now, sit back and get into a groove, and knit away.
Looking good! The fabric that comes off your fingers is wider and shorter than what the finished piece will be, so keep this in mind when determining how long to make it. I just kept going until I ran out of yarn, since I knew I would be at least doubling the scarf around my neck.
When you're set to finish, you'll want to bind-off. You'll work from right to left, so you'll start with the stitch on your right ring finger, if you kept with 6 stitches. Slide your ring finger out of the stitch, then slide that stitch onto your right pinky. You now have two stitches on your pinky. Grab the bottom stitch on your pinky and pull it up through the stitch you just put on your pinky. Now we repeat this again to bind off the next stitch: Slide the stitch off your right pinky and put it onto your left pinky finger. Pull the bottom stitch up through the top stitch and off your finger. Continue like this until you have just one stitch left on your left pointer finger.
Slide that last stitch off and weave it into your stitching to keep it from unraveling. Trim off any extra ends. Here's what the front looks like when you're finished (the part that was against the back of your hands).
And here's the back (the side that was facing out while working):
Now tug on the scarf, like you did when winding your yarn into a ball, and you'll see the stitches readjust themselves. The fabric will lengthen and the spaces between the stitches will disappear. The fabric will roll so your scarf will look like a long tube.
Tie it around your neck and go show it off!
If anything is unclear, please let me know and I'll do my best to help. Hopefully my tutorials will get better as I do more of them. *smile*


I love old t-shirt projects! I'll totally have to try this! I'll let you know how it turns out!
ReplyDeleteHey looks cool, girl! Nice work!!
ReplyDelete